
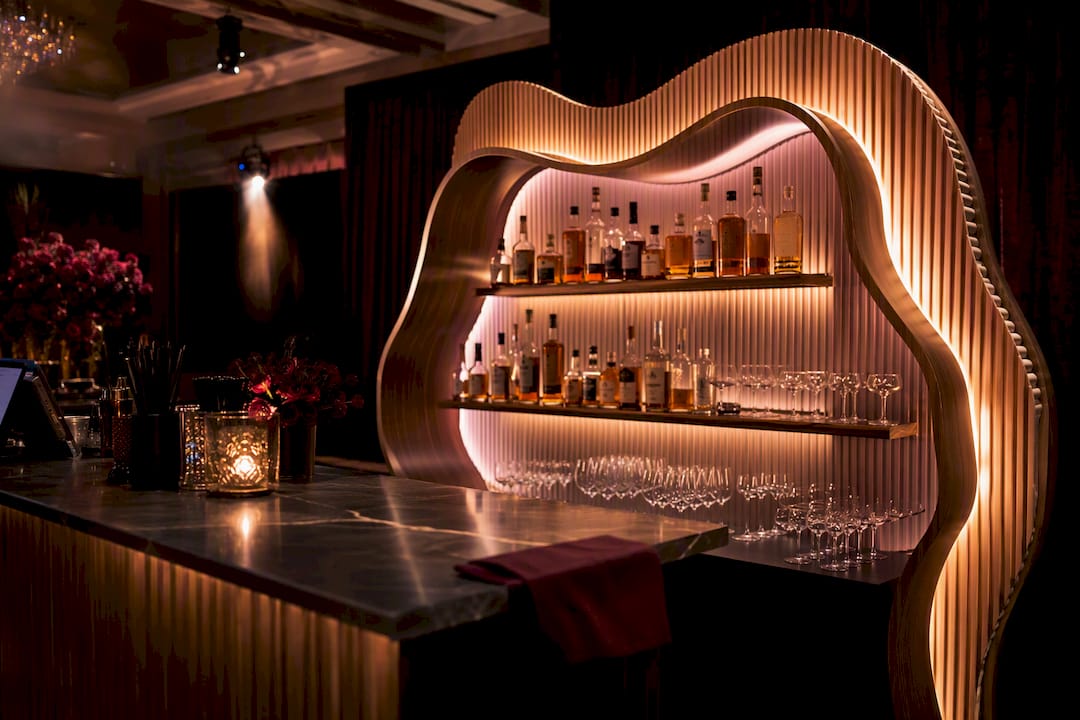
The formula that makes a bar Instagrammable comes down to four things working together: a single strong focal point, warm and flattering light, drinks styled to photograph well, and your handle or hashtag placed where guests can actually see it. Miss one piece and the whole setup falls flat in photos, no matter how much you spent on the rest. The sections below turn that formula into a checklist you can hand to a venue manager or event bartender.
TL;DR:
- Focus on creating a strong focal point backdrop, warm layered lighting, and styled cocktails with fresh garnish to maximize photo impact within limited time.
- Prioritize building a visually appealing backdrop and lighting in 1 to 4 hours, as they have the highest impact and relatively manageable cost.
- Ensure seating is uniform, sturdy, and placed in a way that enhances photos without blocking the bar line or guest flow.
- Position signage and photo-op stations strategically to encourage guest participation without causing congestion during service.
- Use durable plants and florals to lend an established feel, but keep them away from high-traffic areas to avoid tripping hazards and wilting.
Table of Contents
- What Makes a Bar Setup Instagrammable? A Quick-Priority Checklist
- Designing a Focal Point and Backdrop That Reads on Camera
- Lighting That Flatters People and Bottles
- Cocktail Styling and Garnish Prep That Hold Up Under Service
- Why Seating Arrangement Shapes Every Photo Taken at Your Bar
- Building Photo-Op Stations and Signage That Actually Get Used
- Logistics Checklist: Staffing, Equipment, and Budget
- Client Resources and Real-World Notes From Liquid Courage LV
- Using Plants and Florals to Soften a Bar Setup
- Optimizing Your Bar Setup for Phones and Professional Cameras
- Planning Your Space Layout So Photos Don’t Block the Bar Line
- Balancing Photogenic Design With Service That Actually Holds Up
- Hire Liquid Courage LV to Build Your Instagrammable Bar Setup
- Sources
- FAQ
What Makes a Bar Setup Instagrammable? A Quick-Priority Checklist
Not every visual element carries equal weight. Some changes cost almost nothing and transform every photo; others need real budget and a full afternoon of setup. Here’s how to triage, roughly in order of photo impact:
- Focal point backdrop (neon sign, floral wall, mirrored shelving): high impact, medium to high cost, 2 to 4 hours to build.
- Warm, layered lighting: high impact, low to medium cost, 1 to 2 hours to rig.
- Styled cocktails with consistent garnish: high impact, low cost, ongoing during service.
- Visible signage with your handle and hashtag: medium to high impact, very low cost, 15 minutes to place.
- Matching commercial-grade seating: medium impact, medium to high cost, 1 hour to arrange.
- Natural elements (plants, florals): medium impact, low to medium cost, 30 to 60 minutes.
- Photo-op prop station: medium impact, low cost, 30 minutes.
- Backbar styling and shelving: medium impact, medium cost, 1 to 3 hours depending on inventory.
If you only have a weekend to plan, put your energy into the backdrop, the light, and the drinks. Everything else is refinement. The deeper how-to sections below walk through each one.
Designing a Focal Point and Backdrop That Reads on Camera
Every photographed bar has one thing your eye lands on first. That’s the job of the backdrop, and it can be a neon sign, a floral arch, a hand-painted mural, or a well-lit shelving wall stacked with bottles and glassware. Postermywall’s guide to Instagrammable bar experiences points to a single clear focal point as one of the recurring traits across the bars that actually get photographed.
Think about composition the way a photographer would. Guests shoot from roughly chest to eye height, so your focal point needs to read clearly at that angle, not just from above. Repetition (a row of identical glasses, a stacked bottle display) creates rhythm, while empty wall space around the centerpiece keeps the shot from feeling cluttered.
Five theme directions that work well at events:
- Desert modern: terracotta tones, dried florals, brass fixtures.
- Retro Vegas: neon script sign, velvet backdrop, gold rim glassware.
- Botanical garden: living plant wall, greenery garland, ceramic vessels.
- Minimalist monochrome: single accent color, matte black shelving, geometric signage.
- Tropical escape: bamboo accents, citrus garnish bar, palm print backdrop.
Pro Tip: Build your backdrop to be photographed from one primary angle, then check it from where guests will actually be standing in line, not from where you’re standing while setting up.
Lighting That Flatters People and Bottles
Color temperature makes or breaks a bar photo faster than any prop you buy. Warm light in the 2700K to 3000K range flatters skin tones and makes glassware glow instead of looking clinical, a point Bloomingfieldhome’s bar decor guide makes when discussing how to plan a bar wall for photos. Cool white light, by contrast, tends to flatten everything and wash out garnish color.
Layer three types of light instead of relying on one overhead fixture: ambient light for the general space, shelf or task lighting to highlight bottles and tools, and a soft backlight behind the focal point to create depth and separation from the wall.
For mobile setups where you can’t rewire a venue, portable options work well:
- Battery-powered LED strips with dimmer remotes for shelving.
- Clip-on warm bulbs for temporary structures or arches.
- Freestanding uplights aimed at the backdrop, not at guests’ faces.
Postermywall’s event guide notes that battery-powered dimmable fixtures let event bars create flattering light without touching a venue’s electrical system, a detail worth confirming with your venue coordinator before setup day. Always run cords along walls, not across walkways, and tape down anything guests could trip over.
Cocktail Styling and Garnish Prep That Hold Up Under Service
A small selection of signature drinks is ideal for most events. Fewer than that limits the visual variety in photos; more than that slows down your bartenders and creates inconsistent pours when things get busy.
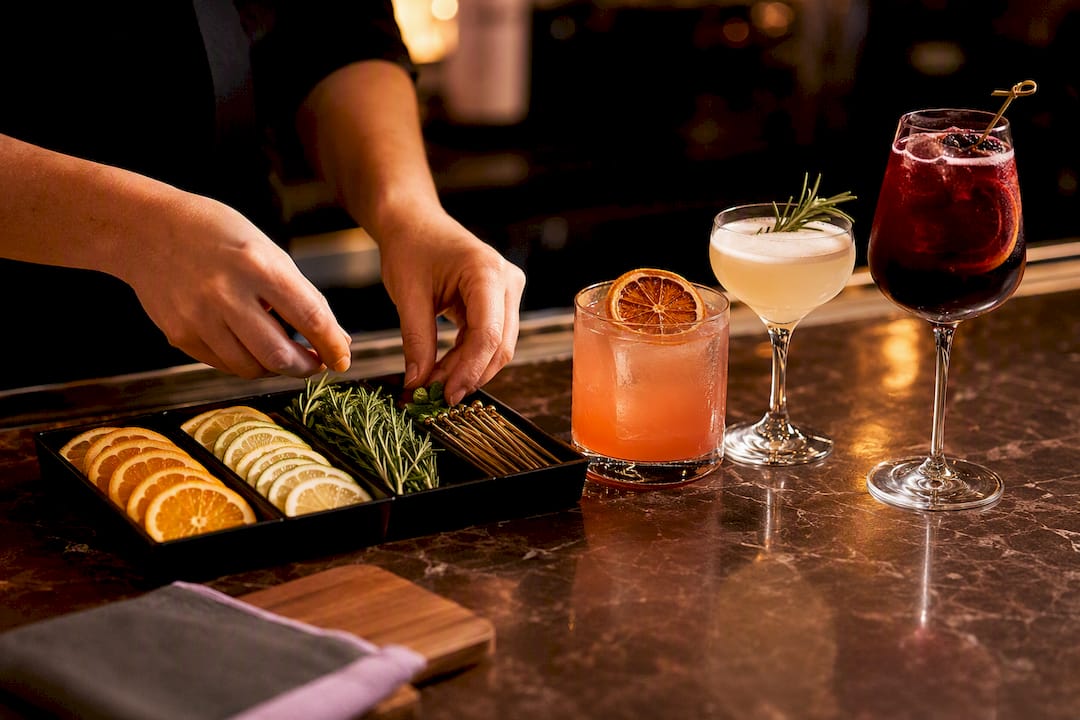
Garnish presentation is where most photogenic drinks fall apart during service, not in the planning stage. Herbs wilt, citrus wheels dry out, and edible flowers brown within hours if they’re prepped too early. Liquid Courage LV’s garnish storage guidance recommends short par windows, generally holding prepared garnish for around two hours before restocking and discarding anything held past 24 hours.
A few presentation choices matter more than people expect:
- Match glassware to the drink’s color story, not just its category (a clear rocks glass shows off a layered cocktail; a coupe hides it).
- Prep garnish in small batches close to service rather than one giant tray at the start of the night.
- Hand off drinks on a small tray rather than sliding them across the bar, which keeps garnish intact for the first photo.
Why Seating Arrangement Shapes Every Photo Taken at Your Bar
A row of matching stools does more visual work than most hosts expect. Captionology’s research on commercial bar stools found that a repeating pattern of identical seating shows up constantly in popular bar photos, and it tends to prompt guests to caption the shot as “my spot.”
Commercial-grade stools also survive a six-hour event without wobbling, scuffing, or looking mismatched by 10 p.m., which matters just as much as how they look in the first photo of the night.
Keep rail height at standard standing bar height, space stools evenly about two feet apart, and layer your foreground (drinks, hands, glassware) against the backdrop so guests aren’t flattened into one visual plane.
Pro Tip: Keep spare stools that match the setup available, since mismatched replacements can detract from the visual cohesion in photos.
Building Photo-Op Stations and Signage That Actually Get Used
A photo station only works if it doesn’t compete with the bar line for space. Keep it small, off to the side, and self-explanatory so guests use it without needing an explanation.
- Place one primary photo station near the bar but outside the ordering line, ideally with the backdrop as its background.
- Add a second, smaller station (a prop shelf or a simple frame) somewhere guests naturally pause, like near the entrance or a lounge seating area.
- Write signage in large, simple type: your handle and event hashtag first, venue or couple name second, and keep it under two lines.
- Position signage at eye level, not above the bar where it gets lost in bottle displays.
- Refresh props at the halfway point of the event (new flowers, a swapped sign, a restocked prop tray) to give late arrivals a reason to post again.
Logistics Checklist: Staffing, Equipment, and Budget
Aesthetics only work if service keeps pace with them. A general staffing guideline is one bartender per 30 to 50 guests, and that number should shift down if your setup includes a busy photo station pulling guests toward the bar in clusters rather than a steady line. Liquid Courage LV’s hiring guide breaks down how staffing ratios shift for photo-heavy events.
Your equipment list should cover:
- Lighting: LED strips, clip-on bulbs, dimmer controls, backup batteries.
- Signage: handle/hashtag display, menu cards, directional signs.
- Shelving and mirrors for the backdrop wall.
- Glassware sized for your signature drinks, plus 15% extra for breakage.
- Garnish coolers to hold prep at safe temperatures through service.
Budget brackets vary by scale: a small setup (backdrop plus lighting kit) typically runs at the lower end of a rental budget, a medium setup adds custom signage and florals, and a premium setup includes a built backdrop structure, professional lighting rig, and dedicated photo-op staffing. Plan your build timeline for 3 to 5 hours before doors open, depending on backdrop complexity.
Client Resources and Real-World Notes From Liquid Courage LV
There are guides on interactive cocktail stations and branded cocktail design that cover setups built specifically for guest engagement and photo moments.
On event day, the most common adjustment is lighting position. A fixture that looked perfect during setup often needs to shift once guests start clustering and casting shadows across the backdrop, so plan for a quick second pass right before doors open.
Using Plants and Florals to Soften a Bar Setup
Greenery does something hard fixtures can’t: it makes a rented or temporary bar feel established rather than assembled for one night. A few well-placed plants soften the hard edges of shelving and signage, and they read as intentional design rather than decoration bolted on at the last minute.
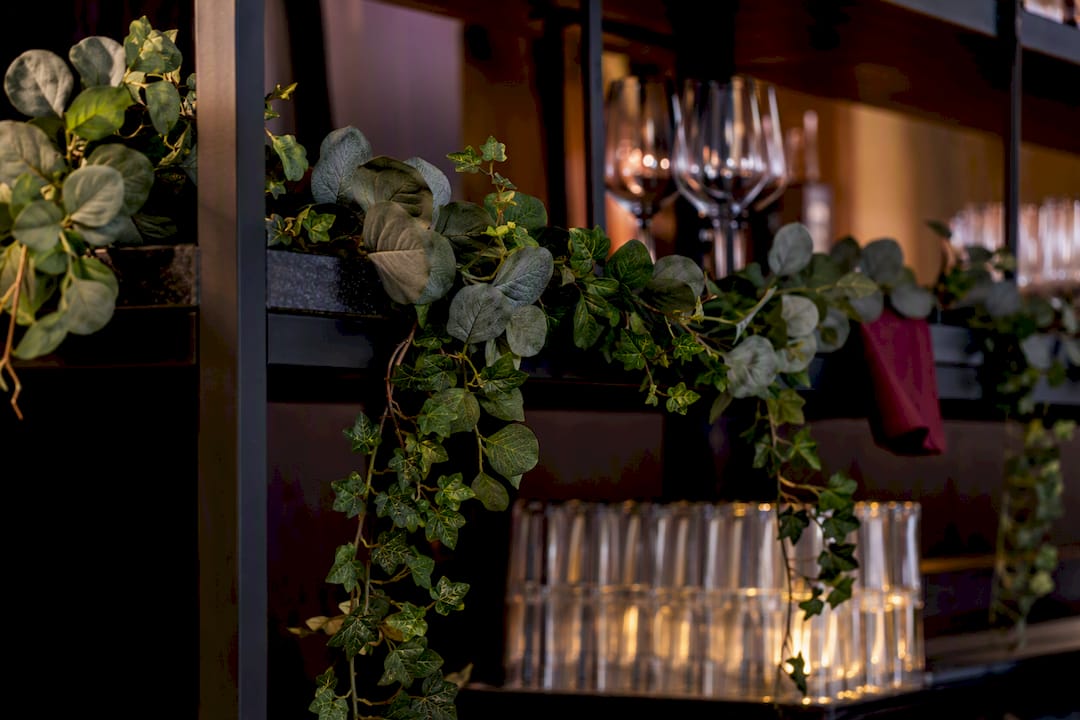
For events, living plants are usually more trouble than they’re worth. Stick to durable options that survive transport, heat, and being brushed against repeatedly over a six-hour event. Trailing greenery like faux eucalyptus or ivy draped along shelf edges holds up better than delicate stems in loose vases, which tip over the moment someone leans on the bar.
Fresh flowers earn their place near the focal point, where they get photographed early and often, rather than scattered across the whole setup where they wilt unevenly by the end of the night. A single floral arrangement anchoring the backdrop does more visual work than a dozen small vases spread across the bar top.
Consider these placement options depending on your theme:
- A hanging floral arch framing the primary photo backdrop.
- Potted greenery flanking the bar on the floor, which also helps define the space without a physical barrier.
- Small floral accents tucked into shelving alongside bottles, echoing the drink garnish for a cohesive look.
- A living herb display (mint, rosemary) that doubles as both decor and garnish source, though this works better for smaller private events than high-volume corporate bars.
Whatever you choose, keep the plants away from direct guest traffic. A trailing vine that looks perfect in the afternoon setup photo can become a tripping hazard once 100 people are moving through the space.
Optimizing Your Bar Setup for Phones and Professional Cameras
Smartphone cameras and professional cameras see light differently, and a setup built only for one will disappoint guests shooting with the other. Most guests will be shooting on phones, so that’s where your lighting and composition choices should be optimized first.
Phone cameras struggle most with mixed color temperatures. If your ambient light is warm but a stray cool-white fixture bleeds into frame, phone software tries to correct for both and often gets neither right, leaving skin tones and bottle colors slightly off. Keep every light source in the same warm range near your backdrop to avoid this.
Phones also handle high contrast poorly compared to a dedicated camera. A bright neon sign against a pitch-dark background will often blow out or flatten on a phone screen, so add a small amount of fill light near the backdrop’s darkest areas rather than relying on the sign alone to carry the shot.
For hosts hiring a professional photographer alongside the open bar, give that photographer a few minutes of access before doors open. Professional cameras handle low light and mixed sources far better than phones, but they still benefit from knowing where the primary focal point sits and where guests will naturally gather. A five-minute walkthrough saves the photographer from hunting for the shot mid-event.
One more practical note: reflective surfaces like mirrors or metallic signage can create glare spots on phone cameras that a professional photographer would simply angle around. Test your backdrop with a phone camera during setup, not just with your own eyes, since what looks fine standing in the room can wash out entirely on a screen.
Planning Your Space Layout So Photos Don’t Block the Bar Line
The single biggest layout mistake at event bars is putting the best photo spot directly in the path guests need to take to order a drink. Once people start posing there, the line backs up, drinks slow down, and the photo moment guests wanted becomes the reason they waited 20 minutes for a cocktail.
Separate your photo backdrop from your ordering line by at least a few feet of open floor, ideally with the backdrop angled slightly away from the direct path to the bar rather than facing straight into it. This lets guests step aside to shoot without blocking anyone walking up to order.
Think of guest movement as a loop rather than a dead end. Guests should be able to approach the bar, get their drink, drift toward the photo station or seating area, and continue on without doubling back through the same congested spot. A dead-end photo station, tucked into a corner with only one way in and out, creates exactly the kind of bottleneck that frustrates both guests and bartenders.
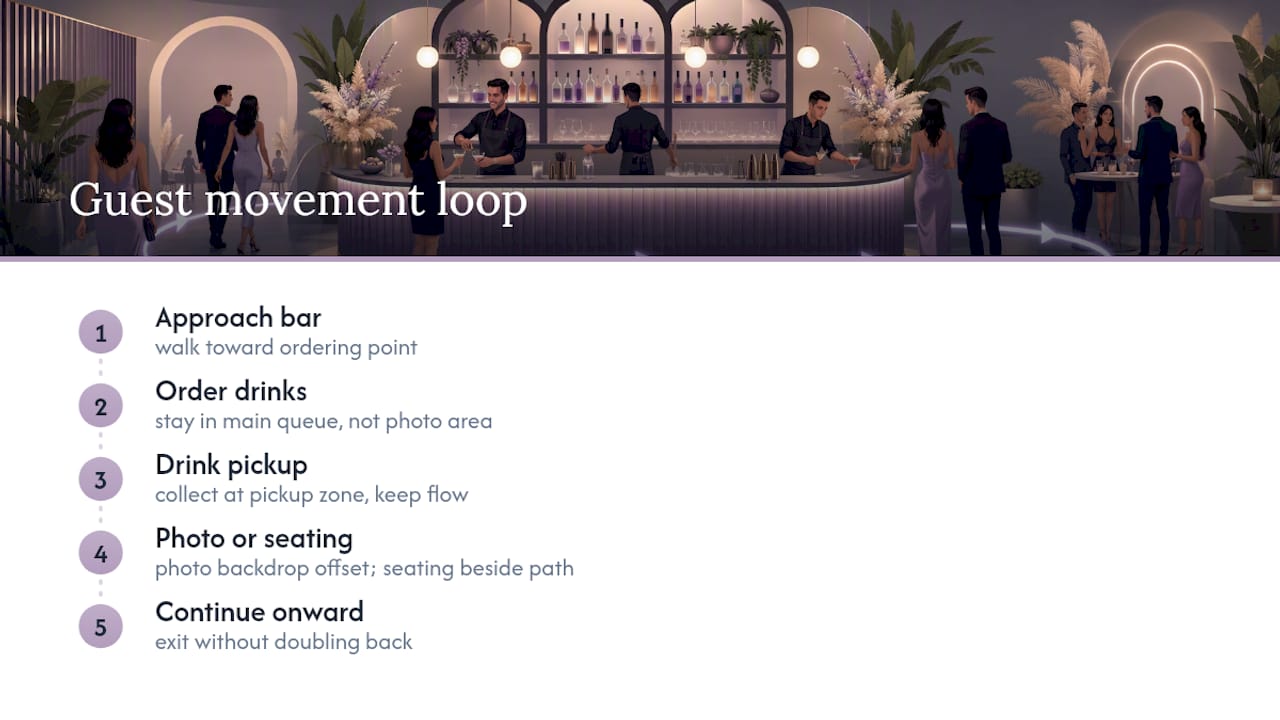
Seating placement plays into this too. Position your row of matching stools where they extend the photo opportunity without narrowing the walkway, and leave enough clearance behind them for staff to pass with trays. If your venue has a natural architectural feature, a window, an archway, a staircase, use it as a secondary gathering point so the entire crowd isn’t funneling toward one backdrop at once.
Balancing Photogenic Design With Service That Actually Holds Up
The instinct to chase the most dramatic backdrop is understandable, but the setups that age well through a full event are the ones built for durability first, style second. A neon sign that flickers by hour three or a floral arch that droops after guests brush past it repeatedly does more damage to your brand than a slightly simpler design that holds its shape all night.
The trade-off worth expecting: the most photogenic choice and the sturdiest choice aren’t always the same one, and prioritizing guest comfort over showiness usually wins in the long run.
— Brennon
Hire Liquid Courage LV to Build Your Instagrammable Bar Setup
A bartending team can build these setups under real event conditions, from wedding cocktail hours to corporate mixers. Instead of piecing together rentals, lighting, and staffing yourself, you get one coordinated team handling the bar design, the drink menu, and the service flow together.
If you’re planning a wedding, a wedding beverage catering guide walks through how branding and bar styling fit into your broader event plan. Corporate planners can review an event bartending hiring guide to see how staffing ratios and setup logistics come together for a photo-ready bar that never falls behind during service. Ready to move forward? Request a quote and get a proposed setup plan built around your venue, your guest count, and your budget bracket.
Sources
- Why Every Instagrammable Bar Starts With the Right Commercial Bar Stools
- Transform Your Space: The Ultimate Guide to Bar Wall Decor in 2026 – Bloomingfieldhome
- How to create an Instagrammable bar experience
FAQ
What Is the 50% Rule in Bartending?
It’s a cost-control concept, not a rule about drink presentation or setup design.
Can You Make $1,000 a Night Bartending?
High-volume events with strong tipping culture can push a bartender’s nightly earnings that high, but it depends heavily on event size, guest generosity, and role (lead bartender versus support staff). It’s not a typical or guaranteed outcome for most shifts.
What Is the Most Profitable Type of Bar?
Bars built around a signature, limited cocktail menu tend to run leaner and more profitable than full-liquor bars with an extensive back bar, since fewer ingredients mean less waste and faster service. For events specifically, a curated 2 to 4 drink menu keeps both cost and complexity down while still photographing well.
What Are the Bar Trends to Watch in 2026?
Warm, layered lighting, single strong focal-point backdrops, and visible social handles on signage are recurring themes across current bar-design guides. Expect more hosts to treat the bar as a designed photo moment rather than just a service station, with matching seating and styled garnish playing a bigger role than in years past.
How Do I Set Up an Instagram-Ready Bar on a Tight Timeline?
Prioritize the backdrop, warm lighting, and drink styling first since those three elements carry the most visual weight, and treat signage and seating as quick add-ons if time is short. Liquid Courage LV can handle the full setup and staffing for hosts who don’t have a spare afternoon to build it themselves.